|
|
Example 2: How to Shrink Wrap a 6 Pack of Bottles
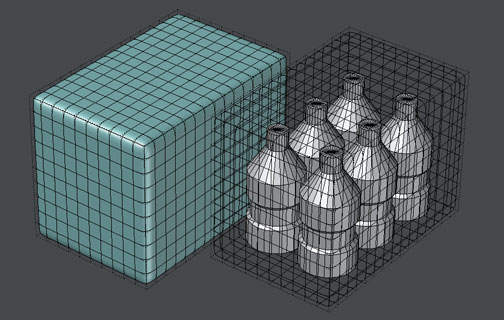
We’ve loaded the “Bottles.lwo” file found in the content. The box-shaped wrapping film SubPatch object has appeared in the first layer, and the six-pack bottles object in the second layer. That does not look like bottles? To be exact, this is a Low-poly dummy bottles object, not an actual object. The cloth simulation is performed while you are dragging your mouse with the Heat Shrink Plus tool active. In this kind of simulation, an object with a higher number of polygons is slower to complete processing as it takes more computational time. Therefore, it is desirable to start the shrink wrapping process with the simplest possible object with low polygon count. With the film object in the foreground, and with the bottles object in the background, we’ll select the Heat shrink Plus tool to make a perfect shrink wrapped pack of bottles.
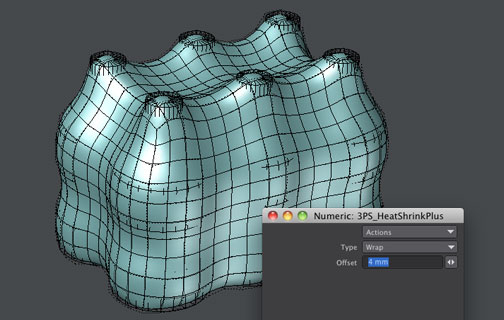
First, we’ve chosen Wrap from the Type pop-up menu, set Offset to 4 mm, and roughly fit the film to the bottles by dragging the mouse because a large air gap between the film and the contents may cause a self-collision of the film.
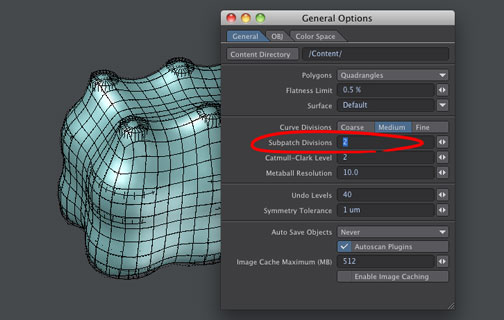
Next, to make the film object more detailed, we’ve opened the General Options Panel by choosing Edit > General Options (default keyboard shortcut o), and made sure the SubPatch Divisions setting is appropriate, usually a setting of 2 or 3. Then we’ve increased the number of polygons with the Freeze command (default keyboard shortcut Ctrl + D), and activated SubPatch mode by pressing the TAB key.
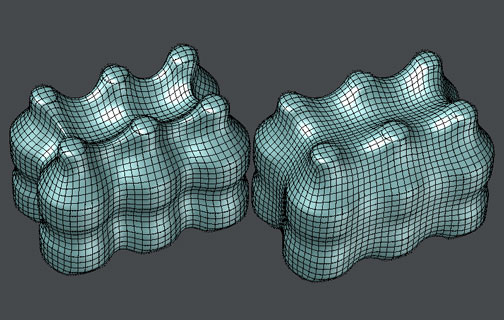
Now let’s keep dragging until you are satisfied with the result. If the shrink wrapped film is too tight and if you don’t want such a result, you can relax the film by slowly dragging or by repeating clicking without dragging. Pressing the spacebar will accept the current result and exit the tool. Finally, we should replace the dummy bottles object with the actual one to complete our work.
|
|